
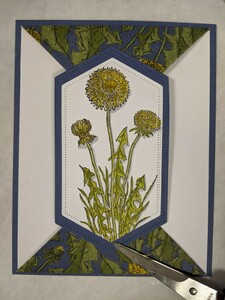
double point fold with Garden Wishes

This is a double point fold card using Stampin' UP! Garden Wishes set and stitched nested labels dies. GreenThumbStampers.com
You will need 1/4 sheet of misty moonlight cardstock
5 1/2 x 4" basic white
2 pieces of designer paper cut 4 x 3"
2nd largest die cut in misty moonlight
3rd largest die cut in basic white
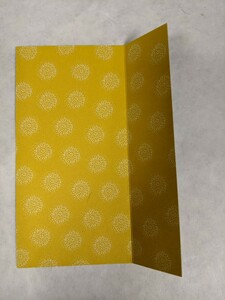
Start by prepping your DSP.
You need two pieces at 4 x 3"
with the 3" side at the top, score at 1"

Fold the sides of the DSP into the score line. You are making the "point" in this step.

glue down the flap pieces
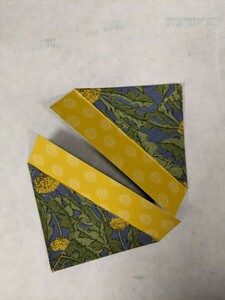
You should have the two points ready to go now.

Now go ahead and put adhesive on the 1" portion you have left and adhere them to the basic white layer.
Put the edge of the white just below the score line to help it bend a little bit easier.

When you have those glued on it will look like this

this layer is going to get glued onto the misty moonlight base

Put glue on the back of the basic white and stick it to the misty moonlight

Now move on to the die cuts. Don't worry if you don't have dies. You can cut rectangles or another shape. You just need something that will span between the two points.

Go ahead and stamp on your basic white layer. You can fill in the whole die cut piece like I did. I used an image from the Garden Wishes set. You could also just put words on it and embellish around it with whatever you have.
I also colored my image with Stampin' Blends

Now you need to adhere the die cut to the front of the card. I used some double sided tape on the top flap. I wanted it to be stronger so I knew it was not coming off.
Put the adhesive on the top flap, be careful to make sure you see how much of the area needs the adhesive.
When you have it attached you might find that the die cut doesn't lay flat and closed.
You can get some velcro dots to keep it closed. They make some that are good for crafting because they have a light velcroness (is that a word?) and don't need a lot of pulling to get it apart.
There are also magnets used for crafting that would work as well.

I finished it off with a little dragonfly that came from the dragonfly punch in the J-J mini. I popped him up with a sliver of a dimensional.
Inside I stamped a greeting. Make sure whatever words you choose will fit in the center of the card, behind the die cut. If it's too wide it will hang out the sides.
 Stitched Nested Labels Dies
149638
Stitched Nested Labels Dies
149638

 Dandy Garden 6" X 6" (15.2 X 15.2 Cm) Designer Series Paper
154297
Dandy Garden 6" X 6" (15.2 X 15.2 Cm) Designer Series Paper
154297
 Misty Moonlight 8-1/2" X 11" Cardstock
153081
Misty Moonlight 8-1/2" X 11" Cardstock
153081
 Basic White 8 1/2" X 11" Cardstock
159276
Basic White 8 1/2" X 11" Cardstock
159276
 Misty Moonlight Classic Stampin' Pad
153118
Misty Moonlight Classic Stampin' Pad
153118
 Tuxedo Black Memento Ink Pad
132708
Tuxedo Black Memento Ink Pad
132708
 Old Olive Stampin' Blends Markers Combo Pack
144597
Old Olive Stampin' Blends Markers Combo Pack
144597
 Daffodil Delight Stampin' Blends Markers Combo Pack
144603
Daffodil Delight Stampin' Blends Markers Combo Pack
144603
 Smoky Slate Stampin' Blends Markers Combo Pack
145058
Smoky Slate Stampin' Blends Markers Combo Pack
145058
